
Key facts: Wet Drywall: Save or Replace
How to judge
Four questions to ask
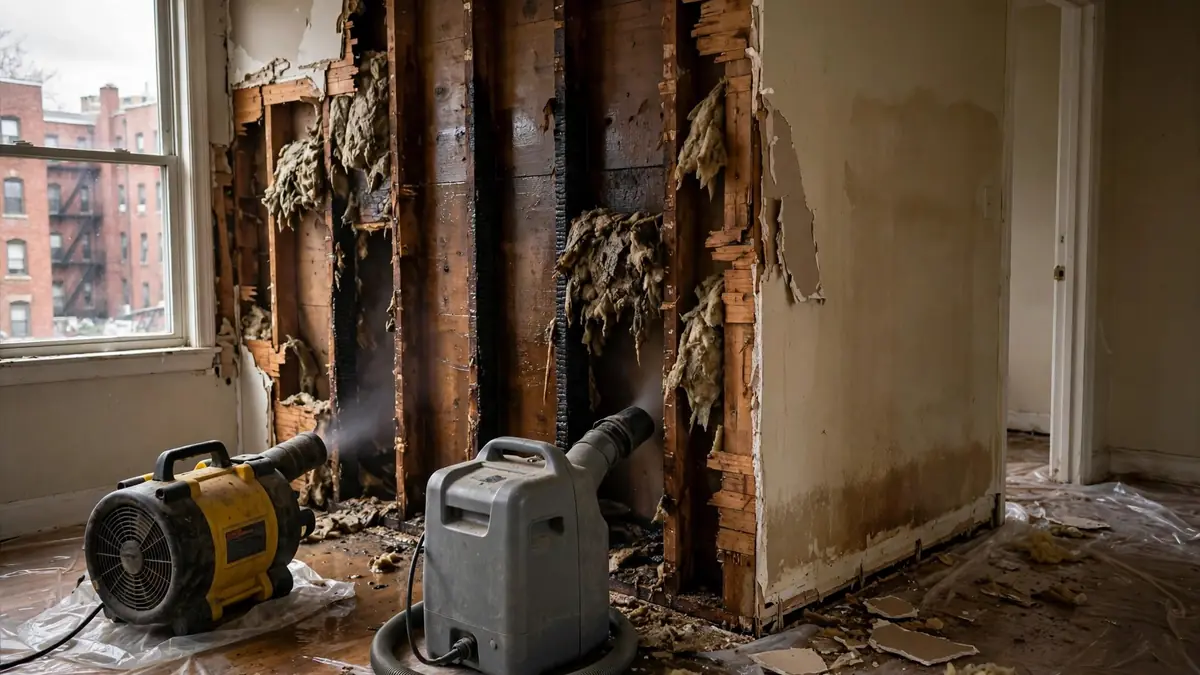
What kind of water was it? How long has it been wet? Is the board soft, swollen or peeling? Is there wet insulation behind it? Insulation holds water against the wall and usually means opening it.
See water damage categories explained for the first question.
What sits behind wet drywall
A stain alone does not settle it
Ceilings
Be careful overhead
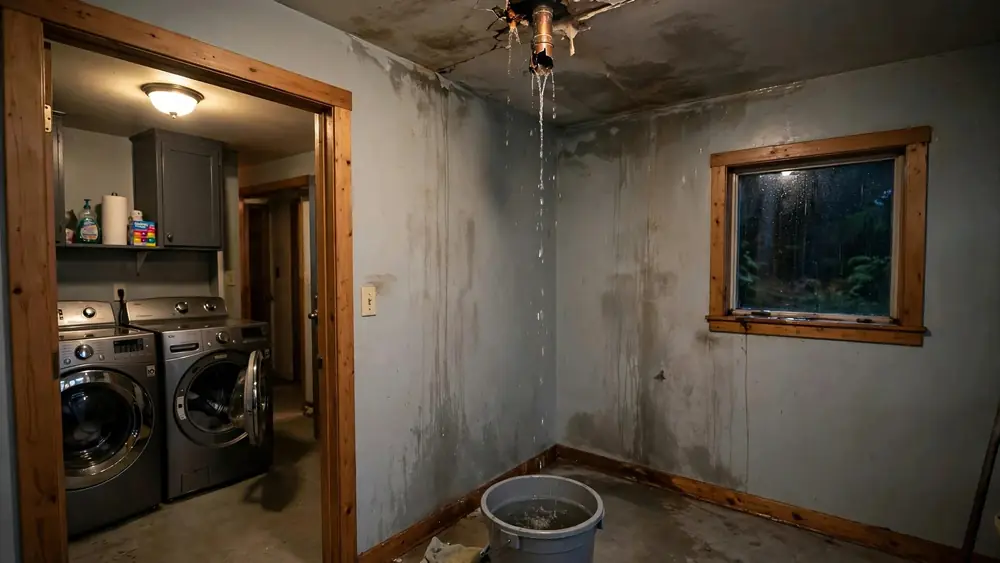
Wet ceiling board can fall without warning, so treat any sag as a hazard. Keep people out from beneath it. Older walls may contain lead paint or asbestos, which should be tested before cutting.
Answer first
The rule of thumb for wet drywall
Keep drywall when the water was clean, it was caught quickly, the board is firm and flat, and the cavity behind it can be dried. Replace it when the water was contaminated, when the board has swollen, crumbled or come loose, when wet insulation sits behind it, or when mold has started.
EPA gives a helpfully direct test for clean-water events. Wallboard with no obvious swelling and with seams intact may be dried in place. If not, EPA says to remove, discard and replace it, and to ventilate the wall cavity if possible. Keep in mind that this table covers clean water and a response within 24 to 48 hours. If the wall has been wet longer, or mold is present, the agency sends you to its mold remediation guidance instead.
Drywall is a thin sheet of gypsum between two layers of paper. The gypsum weakens when wet, and the paper is food for mold. So the question is really whether the core has kept its strength, and whether the paper has dried before anything could begin to grow on it.
Decision table
Keep or cut: the signs that decide it
Run through this list wall by wall. One bad answer may be enough to replace a section, though usually not the entire wall.
| What you find | What it suggests |
|---|---|
| Clean water, wet for a short time, firm surface | Good candidate for drying in place |
| Paint bubbling or peeling but the board feels solid | May dry, but will need finish work and a close check |
| Soft spots or crumbling when pressed gently | Cut out the affected area |
| Visible swelling, or joint tape and seams pulling apart | EPA says remove and replace |
| Ceiling sagging between joists | Hazard; keep clear and replace |
| Sewage or floodwater reached it | Generally cut out, well above the wet line |
| Wet insulation behind it | Usually open the wall to remove the insulation |
| Mold growth on the surface or the back | Remove, following mold guidance |
| Musty odor with normal surface readings | Check the back of the board and cavity |
| Fire-rated assemblies or shared walls in multifamily buildings | Ask before cutting, because repairs have to meet requirements |
Hands-on
Testing a wall at home
You can do these checks without tools you do not already have, and a basic meter makes them better. Turn off power to that wall if you will be near outlets.
- 1
Press gently
Use your thumb at the base of the wall and every foot or so upward. Solid walls feel the same throughout, and soft or spongy spots do not.
- 2
Look across the surface
Hold a flashlight flat against the wall. Swelling and waves show up as shadows.
- 3
Check the seams and tape
Look for cracks, lifted tape or lines that were not there before.
- 4
Tap it
A knuckle tap on sound board has a firm sound. Wet or detached board often sounds dull or different.
- 5
Read the base
If you have a meter, compare to a dry section of the same wall type, and mark where the numbers fall back to normal.
- 6
Look behind a baseboard
Pulling the baseboard shows the bottom edge, which often gets wet first. Keep the trim so it can go back.
- 7
Note the other side
A wet wall has two faces. Check the adjoining room or closet as well.
Inside the wall
Why the cavity matters more than the board
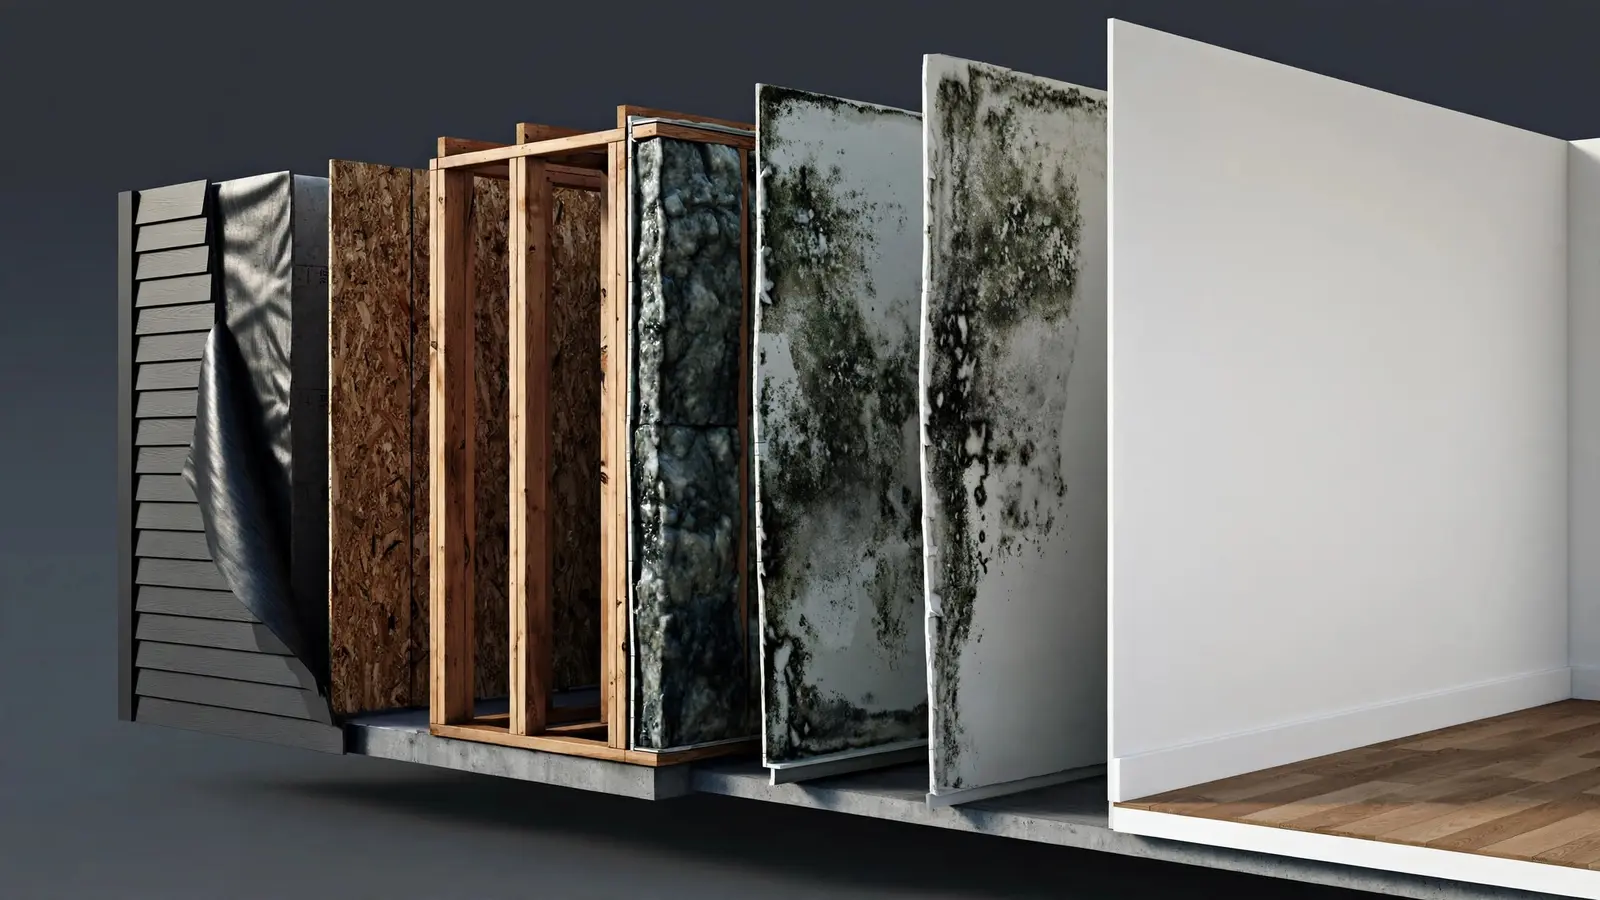
A wall is a sandwich. The board may be wet on the room side and much wetter on the back. Insulation, framing, sheathing and sometimes a vapor barrier are all in there, and none of them dry quickly when the wall is closed.
Fiberglass and cellulose insulation both appear in EPA's list as materials to discard and replace if they get wet. In practice, this often settles the question. When a wet exterior wall has insulation in it, opening the wall may be necessary, and then the board has to come off regardless of how firm it was.
Interior partition walls are easier, as they often have no insulation. Contractors may be able to dry them by removing the baseboard, drilling small holes near the bottom of the wall, and pushing air into the cavity. The same principle is what you can see on the structural drying page. Whether that fits depends on the source of the water, wall construction and readings.
Cutting
Water height and the flood cut
When drywall has to go, it is usually cut in a straight horizontal line above the highest wet point. People call this a flood cut. Common practice is to cut somewhat above the water line, since drywall wicks moisture upward beyond what you can see. The exact height depends on readings and water type, so don't accept a figure without seeing numbers.
Cutting along a straight line makes for neater repairs, and a cut that lands on a framing stud or at a sensible height can make patching simpler. Before any cutting, find out what's behind the wall. Turn off power to any circuits in that area, watch for wiring and plumbing, and use a cutting depth that goes through the board without reaching deeper.
Lead paint and asbestos are real issues in older buildings. EPA warns that sanding or demolishing pre-1978 surfaces can spread lead dust. Contractors working in those homes must use lead-safe practices. Older joint compound and some other materials may contain asbestos, so test before cutting if there is any doubt.
Variations
Finish materials that change the answer
The kind of wall you have affects both what happens to it and how hard it is to dry.
- Vinyl wallpaperIt works like a raincoat, holding water in the board. It often needs to be stripped or the board removed.
- Gloss or oil-based paintIt slows drying, so the wall may take longer than a matte painted wall.
- Tile backer in bathroomsTile can hide wet board for a long time. Loose tiles or failed grout are signs, and drying behind tile is difficult.
- Moisture-resistant or mold-resistant boardThese may resist water and growth better, but they are not immune, so check them the same way.
- Plaster and lathThis is not drywall. Plaster often dries more slowly and may be worth keeping, but ask someone with old-house experience.
- PanelingEPA says to pry wet paneling away from the wall to dry it, as moisture and mold may hide behind it.
- Garage or firewall boardWalls between a garage and living space, or between units, may have fire-resistance requirements. Repairs have to meet these.
Overhead
Ceiling drywall needs its own rules
Ceilings fail differently. Water pools on top of the board, adds a great deal of weight, and softens the gypsum from above. A wet ceiling can come down with little warning and bring wet insulation with it. Stay out from under any bulge, move what you can out of the room, and do not poke it unless someone has told you it is safe and you are prepared for what comes out.
Clean-water ceilings can sometimes be dried if they have not sagged and if insulation above them can be dealt with. Sagging, discolored or repeatedly wet ceilings are generally replaced. In some attic ceilings, loose blown-in insulation must be removed first, since it holds water on the board.
Find the source too. Stains on a ceiling can be a long way from where the water started, since it may run along a joist or pipe. If it is under a bathroom, think plumbing. If it is at the top floor and worse after rain, think roof.
Time
How long is too long for drywall?
There is no exact time at which drywall has to be replaced. Use these as a framework.
- Under 48 hours, clean waterDrying in place is often realistic if the board looks and feels sound. This is the case EPA's table describes.
- More than 48 hours, clean waterCheck more carefully. Forty-eight hours is a soft line, because growth can occur earlier and may not occur later.
- Days or weeks, or a slow hidden leakPaper-faced drywall has often begun to deteriorate, and the back of the board may show growth. Replacement is more likely.
- Repeated wettingEach cycle weakens the board and gives mold another chance. Fix the cause, then replace what has failed.
- Any duration, contaminated waterTime is not the deciding point. Contaminated porous board is generally removed.
Mold
Mold on or behind drywall
Do not paint over mold. Absorbent materials can have mold growing into their spaces and crevices, which makes it difficult to remove, and EPA says such items may need to be thrown away. Drywall paper falls squarely into this group, so moldy board is generally cut out, not cleaned.
EPA's general line for homeowners is about 10 square feet of growth. Under that, you can usually handle it yourself. Over it, or where water damage is extensive, consult EPA's larger guidance. Consult a professional if the source was sewage or other contaminated water, and speak with a health professional first if you have health concerns. Cutting moldy drywall disturbs spores, so if you do it yourself, wear protective gear and avoid spreading dust through the home.
A musty smell without visible growth may mean mold is growing on the back side of the board. EPA lists this among common hiding places. The mold prevention page has more on that.
Putting it back
Finishing a repair so it stays fixed
Repairs go wrong most often because the wall was closed too soon. A good sequence looks like this.
- 1
Confirm the source is fixed
Do not begin repairs until the leak is repaired, tested and has had a chance to show any further problem.
- 2
Get final readings
Studs, sheathing, and remaining board should all match a dry reference.
- 3
Replace insulation and vapor barrier if removed
Use materials that are right for that wall and meet the requirements in your area.
- 4
Hang and finish the new board
Leave a small gap at the floor, where appropriate, so the board does not wick water from the floor in a future leak. Fire-rated walls need particular care.
- 5
Prime before painting
A stain-blocking primer stops old marks from showing through. It does not fix moisture, so do this only after the wall is dry.
- 6
Check again later
After a few days of heating or cooling, look for new marks, and watch after the next heavy rain or fixture use.
Meanwhile
Do's and don'ts while you wait
A few choices in the first days can make a keepable wall much easier to rescue.
- Do pull dressers and sofas clear so air reaches the damp board.
- Do pull cabinets' kick plates or open access panels if you can do so without damage.
- Do take photos with a date, and note how high the marks go.
- Don't paint or skim-coat to hide stains until the wall is confirmed dry.
- Don't run heaters right against the board, as high heat can damage finishes and does not reach the cavity well.
- Don't drill drying holes in walls that may have wiring, plumbing, or suspected lead paint or asbestos until you've checked.
- Don't keep fans blowing if the water may be contaminated.
Coverage in general
How insurance usually sees wet drywall
Whether wet drywall is covered depends on your policy and on the cause of the water. Ask your agent or insurer, because this is background and not insurance advice. It often helps to photograph walls before cutting, keep notes of readings, and keep a small sample of removed board if you are told to.
Some jobs have repair questions about how much of a wall has to be redone to look right. Your policy and your adjuster's assessment affect that answer. The adjuster guide covers how to raise those questions and what to prepare for them.
Questions
What people ask about soaked walls
Can I just paint over a water stain?
Only once the wall has been confirmed dry and the source repaired. A stain-blocking primer helps with the mark, but it does nothing about any trapped moisture or mold.
How high should a flood cut be?
There is no one height. It depends on how far the water wicked and what type it was, so go by moisture readings, not a preset figure.
Does drywall dry on its own?
A small clean wet area in a ventilated room might. A soaked wall with insulation behind it generally will not dry fast enough on its own, and its back side can stay wet.
Will drywall fall apart once it dries?
Board that stayed firm usually regains much of its strength, but soft, crumbling or sagging board does not recover.
Is it dangerous to live with a wet wall?
It depends on the source and whether mold has started. CDC lists asthma, mold allergies and compromised immunity as raising the risk, so ask a doctor if there are symptoms.
Location matters
Which rooms and walls are most likely to need replacing
Where the wall sits changes both the risk and the work involved. These are general patterns, and your readings and water source still decide it.
| Location | Why it matters | Typical concern |
|---|---|---|
| Bathroom | Humid even on a normal day; often has tile or moisture-resistant board | Hidden water behind the tile |
| Kitchen | Cabinets cover much of the lower wall | Wet board behind cabinets that nobody opens |
| Basement | Cool, and often next to masonry | Slow drying; wall may sit on or near wet concrete |
| Exterior wall | Contains insulation, sheathing and vapor control layers | Wet insulation; drying may require opening the wall |
| Interior partition | Often has an open cavity with no insulation | Good candidate for cavity drying |
| Ceiling below a bathroom | Repeated small leaks are common | Sagging, staining and wet insulation above it |
| Garage shared wall | May be fire-separation board | Repair must keep the required fire protection |
Obstacles
Cabinets, tubs and other things in the way
Much of the trouble with wet drywall happens behind fixed objects. Plan for these before assuming the wall is fine.
- Base cabinetsPull the kick plate and look with a flashlight. If the wall behind is wet, the contractor may need to remove the cabinet to reach it.
- Bathtubs and showersThe wall behind a tub flange may stay hidden. An access panel from a neighboring closet can help.
- Built-in shelvingFixed units can trap water and block airflow. Ask whether they need to be detached.
- Backsplash and tileRemoving tile may damage it. Readings on the other side of the wall may be a less invasive first step.
- Heavy furniture and appliancesMove these away if you can, and look behind them. The wall behind a washer or refrigerator is often the wet one.
- Electrical boxesMoisture can reach outlets and switches. Have an electrician check any box that has been wet before you use it.
How much to remove
Partial replacement or the whole wall?
Replacing wet drywall rarely means replacing a whole room. Most repairs cut out the wet section, usually in a straight line, and tie new board into what remains. Keeping sound board makes for a smaller job, although a skilled finisher is needed to hide the joint, particularly on smooth walls and under strong side light.
You may want to go further in some cases. If a large part of the wall is affected, or the old surface is uneven, it can be easier to replace a whole sheet than to patch. Texture-matching can be difficult as well. Ask how the repair will look when the room is painted, and whether the whole wall or the room needs repainting so the color matches.
Keep cut lines sensible. A cut at a stud gives the new board something to attach to, and a cut high enough to clear all wet material saves you from cutting again. Ask the contractor to explain why they've chosen that height, using the readings they took.
Do-it-yourself steps
If you decide to cut it out yourself
A small clean-water section is a reasonable project for some homeowners. Stop if the home predates 1978 and you haven't checked for lead and asbestos, or if the water was contaminated.
- 1
Turn off the power to the wall
Use the breaker, then test that outlets are dead. Remember that some circuits may be shared.
- 2
Find what's behind it
Locate studs, wires and pipes first. Be especially careful around outlets and fixtures.
- 3
Mark your line above the wet area
Use your readings to set the height, and allow a margin.
- 4
Score and cut shallowly
Cut only through the board's thickness, with a utility knife or a suitable saw.
- 5
Bag the debris as you go
Wear gloves, eye protection and a suitable mask. Keep dust away from other rooms.
- 6
Pull wet insulation and dry the cavity
Remove wet insulation, then dry the framing and check it with a meter before any rebuilding.
- 7
Photograph everything first and last
Keep the images, particularly if you have a claim open.
Service areas
Wet Drywall: Save or Replace service areas
Local humidity and the age of the housing can sway how a wet wall is handled. See Oregon, Connecticut, Delaware, Kansas, Louisiana, New Hampshire, Chicago, Dallas, Colorado Springs, Cedar Hill, Lake Stevens, Norcross, Port Charlotte, Prosper, Atlanta, Indianapolis.
Sources and citations
- [1]U.S. EPA: A brief guide to mold, moisture and your home
- [2]IICRC: ANSI/IICRC S500 water damage standard
- [3]U.S. EPA: Lead Renovation, Repair and Painting Program
- [4]U.S. EPA: Mold remediation guide, Chapter 4, Table 1
- [5]U.S. EPA: Mold cleanup in your home
- [6]U.S. EPA: Flooding
- [7]CDC: About mold and health